Every cake decorator needs to know how to put picture on a cake. This is because a time would come in your career when someone would demand that you put a picture on their cake. Would you keep on refusing orders that require picture on cake? We think not!
There are many methods of putting picture on cake. You can either paint it on (hand painting, airbrushing or stenciling), do a buttercream or royal icing transfer or use edible icing sheets.
Some people are scared of this technique of cake decoration because they feel it is difficult. However it is not really difficult. In this article, we would share some step by step instructions on how to put picture on a cake with two methods. We believe that by the end of this article, you’ll be raring to put a picture on a cake.
Different Methods Of Putting Picture On Cake
Using Edible Icing Sheets
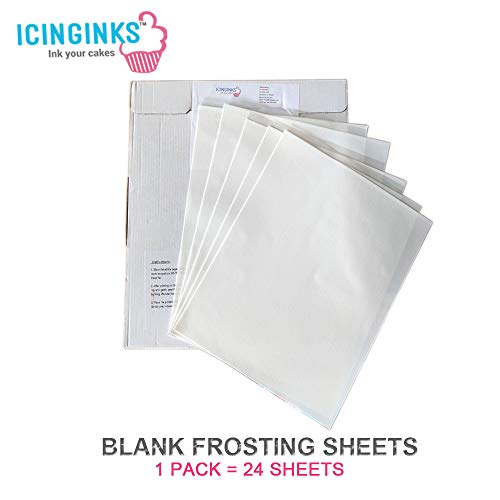
What are edible icing sheets?
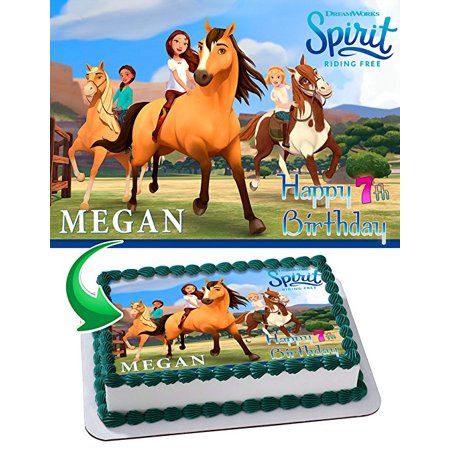
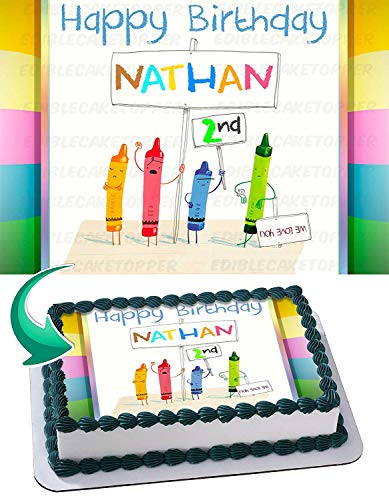
Edible icing sheets are also called frosting sheets and they are used to put picture on a cake . This technique makes the picture look very authentic as it blends right into the surface of the cake.
Edible icing sheets are made of starch or sugar; earlier on edible sheets were made mostly with rice hence the name rice paper. But nowadays a number of other ingredients have come into play; the most predominant being sugar.
Edible icing sheets have plastic backing that help protect the sheet and also keep it pliable until you are ready to place it on the cake.
 [amalinkspro type=”cta-btn-css” ctabtn-id=”” asin=”B06XBKDZTZ” apilink=”https://www.amazon.com/dp/B06XBKDZTZ?tag=cakedecorationproducts-20&linkCode=osi&th=1&psc=1″ addtocart=”false” new-window=”true” nofollow=”true” alignment=”alignright”]Click here to check this out and buy on Amazon[/amalinkspro]
Different Mediums That Can Be Used To Color Picture Onto An Edible Sheet
You can color picture onto an edible sheet using different mediums. Some of them include:-
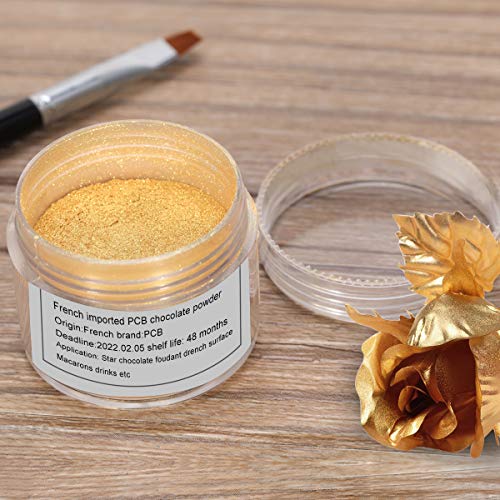
Edible Luster or Petal Dust
You can paint your picture onto an edible icing sheet using edible luster or petal dust. If you want a cloudy clear appearance, use a brush to apply dry luster dust on the picture on the icing sheet. If you want your picture to be more saturated or bolder then liquefy the luster dust before using it.
[amalinkspro type=”cta-btn-css” ctabtn-id=”” asin=”B07K843SZ9″ apilink=”https://www.amazon.com/dp/B07K843SZ9?tag=cakedecorationproducts-20&linkCode=osi&th=1&psc=1″ addtocart=”false” new-window=”true” nofollow=”true” alignment=”alignright”]Click here to check this out and buy on Amazon[/amalinkspro]
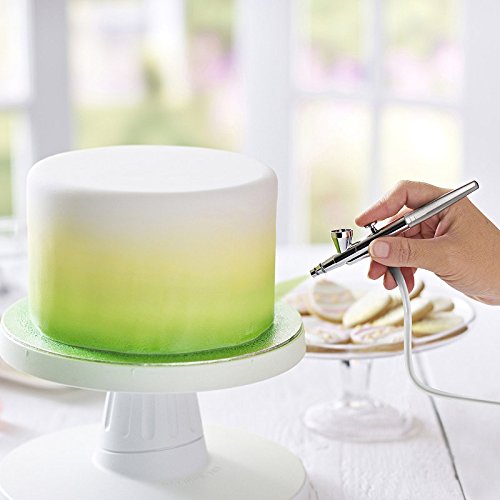
Airbrush
To airbrush a picture onto your edible icing sheet, ensure that you hold your airbrush some inches away from the icing sheet. This is to prevent the colors from pooling or forming smudges on the sheet. You can also use edible color spray. Just follow the same rules for the airbrush.
Click here to check out our article on how to use a cake airbrush. This would give you more insights on how you can use an airbrush on an edible icing sheet.
[amalinkspro type=”cta-btn-css” ctabtn-id=”” asin=”B07JDD3VYL” apilink=”https://www.amazon.com/dp/B07JDD3VYL?tag=cakedecorationproducts-20&linkCode=osi&th=1&psc=1″ addtocart=”false” new-window=”true” nofollow=”true” alignment=”alignright”]Click here to check this out and buy on Amazon[/amalinkspro]
Edible Markers or Crayons
Edible markers or crayon come in handy in drawing picture on edible sheets(especially for real artsy folks). If you can draw free hand you have an advantage because all you need is the edible icing sheet and some edible markers. For those who can’t draw free hand, you can print out the picture you want. Then place the edible icing sheet on it and trace with the edible marker or crayon. Then fill the pattern with icing of your choice.
When you go shopping for edible crayons ensure that they are made with nontoxic ingredients such as soy wax, beeswax or carnauba wax. Also check the process of manufacture to be sure that no toxic material was used.
[amalinkspro type=”cta-btn-css” ctabtn-id=”” asin=”B07ZVZC9VR” apilink=”https://www.amazon.com/dp/B07ZVZC9VR?tag=cakedecorationproducts-20&linkCode=osi&th=1&psc=1″ addtocart=”false” new-window=”true” nofollow=”true” alignment=”alignright”]Click here to check this out and buy on Amazon[/amalinkspro]
Printers
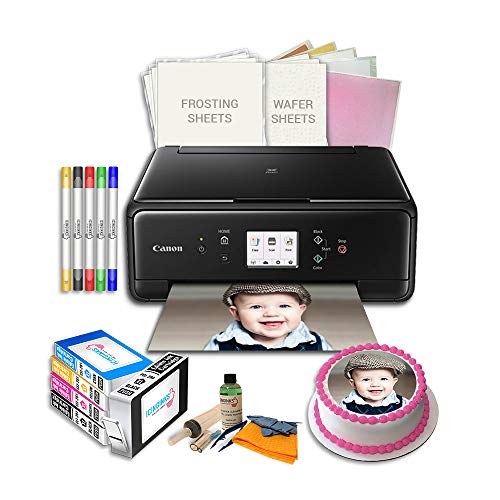
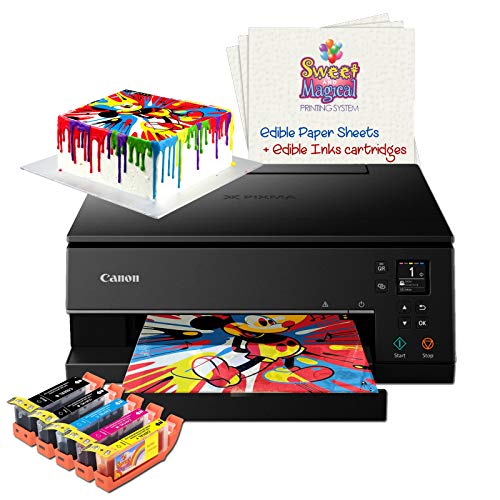
You can use a printer to print out any picture of your choice to put on a cake. However, you have to ensure that the printer has not been used with ink that cannot be ingested. There are special edible/food safe inks that are designed solely for printing on edible icing sheets.
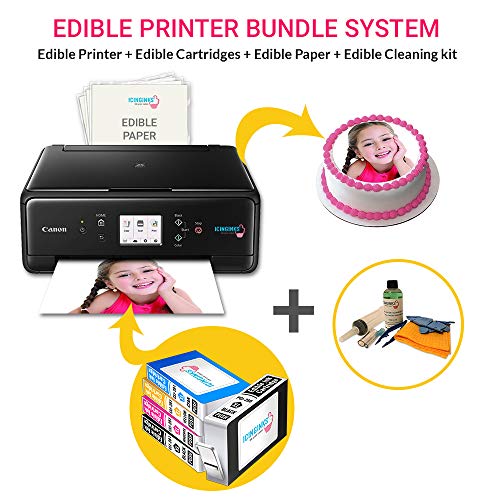
Unlike all the other methods mentioned, this and maybe the airbrushing are not cheap. You would need a printer that’s solely dedicated to edible ink, the edible ink itself and edible icing sheet.
We feel that unless you really do a lot of picture on cake designs, you don’t need to go to the hassle of getting a printer and all that. Because there are a number of cake or craft shops that offer the service of printing your picture on edible icing sheet.
On the other hand, as a cake decorator, it wouldn’t hurt to have the whole picture on cake bundle/kit.
[amalinkspro type=”cta-btn-css” ctabtn-id=”” asin=”B07Y1Q77JQ” apilink=”https://www.amazon.com/dp/B07Y1Q77JQ?tag=cakedecorationproducts-20&linkCode=osi&th=1&psc=1″ addtocart=”false” new-window=”true” nofollow=”true” alignment=”alignright”]Click here to check this out and buy on Amazon[/amalinkspro]
Royal Icing or Buttercream Design Transfer
You can create a picture with royal icing or buttercream on a parchment paper and then transfer to your cake when it dries.
This method is mostly employed for decorating cookies but it works just fine for cupcakes and large cake. However, this method is not one to be done in a hurry; you need to dedicate a couple of days of more. You would understand why when we discuss the steps to this method.
How to Put Picture On A Cake – Materials Needed
Edible Sheets – Edible Printing and Tracing Printed Picture
The materials you would need for edible sheets depends on the technique you want to employ. But for the purpose of this article, we would go with the printing method and the tracing and filling with icing method.
So for DIY printing you’ll need the following:-
Image file (picture you want to use in hard copy)
Icing of different colors including black
Royal Icing or Buttercream Transfer
You’ll need the following:-
Piping bags, couplers and tips
Tracing paper (parchment paper)
Edible marker
Piece of Glass ( Most preferably, a glass cutting board)
How To Put Picture On A Cake- Step By Step Instructions
Printing On Edible Icing Sheet
To print and put a picture on cake is very simple; all you need to do is follow these steps:-
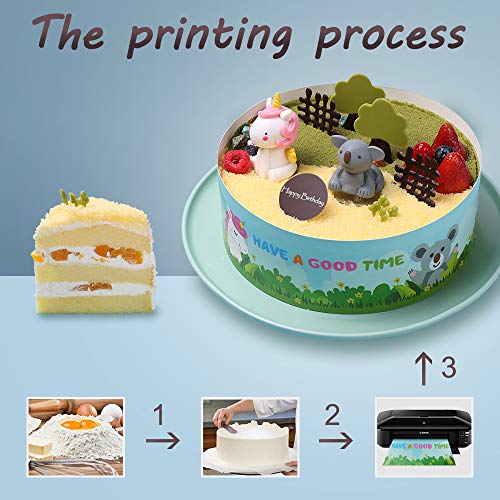
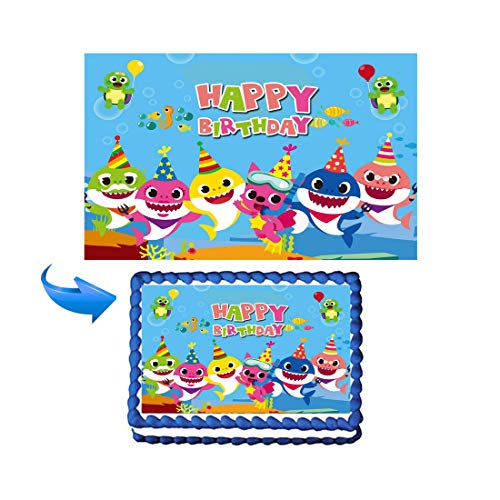
(i) Find the picture you want to use online or scan a picture and upload. Ensure that your picture is clear and has all the details well highlighted. Then print it out on with edible ink and edible icing sheet on the printer that is designated for edible inks only. Take into consideration the size of your cake so that you’ll print out the correct picture size.
(i) Next cut the picture as close to the borders as possible
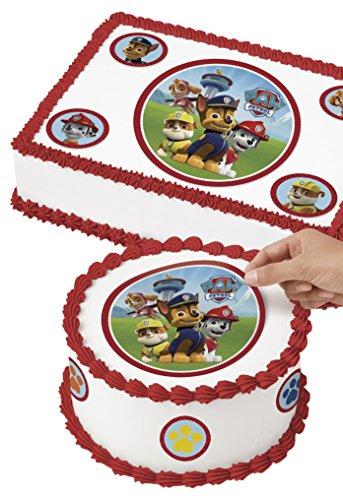
(iii) Remove the plastic backing from the icing sheet and carefully place the picture on the cake
(iv) For fondant covered cake, we usually roll out a thin layer of fondant the size of the picture, then remove the trimmed icing sheet from the plastic backing and place on the fondant layer. Then we trim the fondant to size with the picture before placing it on the cake. The fondant layer serves as a backing for the picture and gives it more definition on the cake. Bear in mind that the fondant has to be the same color with the fondant on the cake. This method also works for frosting with high fat density. The fondant backing would not allow the picture to melt into the icing.
(v) However, if it is a buttercream cake we just ensure that the surface of the cake is slightly crusted (still a little damp to touch but would no dent if lightly pressed with fingertip). Then place the icing sheet directly and gently adhere it to the cake. The icing sheet would be absorbed by the buttercream without blurring the colors or entire picture.
[amalinkspro type=”cta-btn-css” ctabtn-id=”” asin=”B084QF75FK” apilink=”https://www.amazon.com/dp/B084QF75FK?tag=cakedecorationproducts-20&linkCode=osi&th=1&psc=1″ addtocart=”false” new-window=”true” nofollow=”true” alignment=”alignright”]Click here to check this out and buy on Amazon[/amalinkspro]
Tracing And Outlining With Icing
(i) Print out the picture you wish to use with any regular printer. Ensure that the size of the picture would fit the size of your cake.
(ii) Place the edible icing sheet on the picture and trace with edible marker or crayon.
(iii) After that you cut out the image leaving a little margin to the border of the picture
(iv) Next place the template (picture you have cut out of the edible icing sheet) on the cake.
(v) Using a small writing tip with your piping bag that’s been filled with dark icing(preferably black), outline the picture.
(vi) Now fit your other piping bags (that you have filled with icing of different colors) with star tips and fill the picture as desired.
(vii) Finally, use the piping bag and tip that you used to outline the picture to go over the outline again. This would redefine the outline and make the picture pop.
This video shows you how to transfer an image directly onto a fondant covered cake before you proceed to either pipe over it or paint with cake paint. you can also fill with butter icing.
Design Transfer With Buttercream
(i) Follow step (i) of the above. But note that you’ll be using regular paper to print out your picture.
(ii) Trace the picture onto a parchment paper with an edible marker, the finer the tip of the marker, the better for your transfer. Also mark the outer boundary of the cake.
(iii) Turn the picture that you have traced face down on a piece of glass cutting board or transparent acrylic and secure with masking tape.
(iv) Fill a piping bag with black icing and insert a small writing tip to the bag.
(v) Outline the picture.
(vi) Fill your piping bags with different colors of icing as required. Then fit with a star or pastry tip.
(vii) Using the different colors in the piping bags, fill out your picture/design.
(viii) Always place the picture in the freezer after each application of icing. This would prevent the buttercream from smudging.
(ix) Check the picture to be sure that every little spot is filled. If there are any empty spots, you can use a small paint brush to fill them in with icing.
(x) Finally, fill in the background color. Ensure that the background color you use matches with the color of the cake or the surface on which the picture would be placed.
(xi) Smooth out the background color on the cake with an offset spatula.
(xii) Place the picture in the freezer overnight.
Place The Picture On The Cake
(i) When you are ready to use it, remove the picture from the freezer and remove from the glass piece or whatever you placed it on.
(ii) Place the side of the parchment paper with the frozen buttercream on the cake and gently press it into the cake. Peel off the parchment paper.
(iii) After about 20 minutes, the buttercream should have defrosted. Dampen a paper towel that doesn’t have lint. Use it to gently wipe off the lines from all the piping so that you’ll have a smooth surface on the picture.
Watch the accompanying video to understand these instructions better:-
How To Put Picture On A Cake – Expert Tips
Here are some tips from experts that learnt from blunders that made while learning how to put picture on cakes. It is best to learn from the experiences of others; by far cheaper than making our own mistakes.
Preparing the Cake Before Placing the Edible Picture
(i) If your buttercream covered cake has crusted, just spritz a little water on the surface of the cake before placing the edible icing sheet (picture).
(ii) Allow frozen cakes to thaw before you place edible icing sheet on it.
(iii) Dampen the surface of your fondant covered cake a little before placing the edible icing sheet (picture). However, ensure that there are no puddles of water on the cake surface. To make sure of this, you can spritz the cake with some water and then dap it with a dish towel.
Removing the Edible Picture From The Plastic Backing
(i) If your icing sheet wouldn’t peel away from the plastic backing use a hair dryer on it for about 60 seconds.
(ii) In case your edible picture becomes dry and fragile, don’t panic or throw it out. Fold a paper towel into a square and dampen it. Then place it in a plastic bag. Place the edible picture in the bag with the plastic backing being the side that would touch the dampened paper towel. Leave it for about 60 minutes. This will restore the edible picture and make it moist. However, you have to let the picture air dry for about twenty minutes before you place it on the cake.
(iii) Always peel the backing away from the edible sheet and not the other way round. This makes it easier to remove and reduces the risk of damage to the edible picture.
Handling Edible Pictures
(i) Your edible icing sheet/picture would blend with the cake within 5 minutes of placing it on the cake. So after that ensure that you do not touch the picture to avoid smudging it.
(ii) If your edible picture creases or tears while placing it on the cake, gently use a dry fingertip to smooth over it. It would straighten out. If it is a rip, it would join back with the rest of the picture.
(iii) Always avoid any water contact with your edible picture.
(iv) Gently tap out any air bubbles with a dry finger.
We have more articles that would help you improve on your cake decorating skills; check out a few of them below:-
- How To Color Fondant
- Cake Piping Bags- All You Need To Know
- How To Make Fondant Bows
- Cake&Deco Russian Tips-Full Review
- How To Work With Fondant
- Cake Piping Nozzles – Understanding the Essentials
How To Put Picture On A Cake – Conclusion
This article is in no way a conclusive instruction or guide on how to put picture on a cake. There are many ways but from experience, the edible picture is usually the fastest and most convenient.
One thing to remember is that there are different brands of edible icing sheets. This means that different products would react differently. Furthermore, different climatic factors also play a role in how each product would behave. We say this especially because of any issues with removing the edible picture from the plastic backing.
We know that each supplier gives specific instructions on how to use their products. So if you decide to DIY your edible pictures, be sure to follow the manufacturer’s instructions to the letter.
If on the other hand, you choose to order your edible picture whether online or offline, there are also instructions that would help you get the best out of your purchase. You would do well to follow those instructions.
So good luck as you embark on the exciting journey of putting picture on a cake.
[amalinkspro type=”cta-btn-css” ctabtn-id=”” asin=”B07X7GXVHH” apilink=”https://www.amazon.com/dp/B07X7GXVHH?tag=cakedecorationproducts-20&linkCode=osi&th=1&psc=1″ addtocart=”false” new-window=”true” nofollow=”true” alignment=”alignright”]Click here to check this out and buy on Amazon[/amalinkspro]
How To Put Picture On A Cake – FAQs
How Can I Turn A Picture Into A Cake Decoration?
A picture can be turned into a cake decoration by using it in the following ways:-
(i) To portray the theme of whatever the cake is being used to celebrate
(ii) Pictures can be placed all over the cake or in strategic positions on the cake.
(iii) To inscribe message on the cake
The main article on this page is all about the methods that you can use to turn a picture into cake decoration. Read through it carefully and you would learn a lot of ways to put picture on cake.
How Do You Put Non Edible Images On A Cake?
Putting non edible images on a cake follows the same method as using edible pictures; just follow these simple steps:-
(i) Get a picture that you want to use, scan it unto your system and then print it out. Conversely, you can pick out a picture online and print too.
(ii) Trim the picture to size (ensure that you have the right dimensions in proportion to the cake). Then roll out fondant very thinly and attach the picture with edible glue.
(iii) Leave the picture to set on the fondant then place it on your cake.
(iv) If you want the picture to stand on the cake ensure that you attach some toothpick or thin skewers either between the fondants (before leaving it to dry) or behind the fondant.
(v) Stick the picture into your cake when the fondant dries.
How Far In Advance Can You Put An Edible Image On A Cake?
You can put your edible image on your cake as far as 48 hours before display. But the best time to put your picture on your cake is a few hours before display/use. This is because the picture would begin to fade if it stays too long in contact with moisture.
So if you are putting the picture on buttercream covered cake or other softer frostings, it is best to put the picture as close to when you would use the cake as possible. Fondant (and other hard icing) covered cakes are a bit more forgiving with edible pictures so you can put the picture a day before use/display.
[amalinkspro type=”cta-btn-css” ctabtn-id=”” asin=”B07T6CNKRP” apilink=”https://www.amazon.com/dp/B07T6CNKRP?tag=cakedecorationproducts-20&linkCode=osi&th=1&psc=1″ addtocart=”false” new-window=”true” nofollow=”true” alignment=”alignright”]Click here to check this out and buy on Amazon[/amalinkspro]
Can You Refrigerate A Cake With Edible Image?
It is best not to refrigerate a cake with edible images. This is due to a number of reasons and they include the following:-
(i) Humidity might affect the cake and make the cake to sweat thus impacting on the quality of the picture.
(ii) The quality and material of the edible image might not be compatible with refrigeration (this factor can be affirmed by the manufacturer of the image or materials used for it).
(iii) The type of icing used on the cake too, largely affects whether you can store the cake with the image or not.
In conclusion, we would recommend that you conduct a simple experiment with a cupcake and a small edible image. Factor in all these issues we mentioned and you’ll be sure to get what works for you.
How Long Will Sugar Sheets Last On A Cake?
The shelf life of sugar sheets (also known as edible sheets or frosting sheets) is advertised as 6 months. But once you put it on a cake, it wouldn’t last more than 48 hours without losing color and getting distorted. That is why it is best to use the sugar sheets on the cake at most 24 hours before you are ready to use it.
Can You Put Edible Images On Cream Cheese Frosting?
Edible images can be put on all types of frosting including cream cheese frosting. What differs with every frosting however is the method of application.
Frostings with high fat content or moisture would absorb the edible image and it wouldn’t last long on it. So it is best to place the edible image on a plaque of fondant before placing it on the cake. We discussed this method of application extensively in the main article on this post.
How Long Can You Keep Edible Images?
You can keep edible images for as long as 6 months or even a year if they are properly stored in an airtight plastic bag. They must not be in contact with any form of moisture neither should they be left in contact with light. If these conditions are not met, the edible image would be damaged (the colors would fade)
Edible images are made of fragile materials so it is recommended that they be used immediately they are made.
[amalinkspro type=”cta-btn-css” ctabtn-id=”” asin=”B01HSBAO0E” apilink=”https://www.amazon.com/dp/B01HSBAO0E?tag=cakedecorationproducts-20&linkCode=osi&th=1&psc=1″ addtocart=”false” new-window=”true” nofollow=”true” alignment=”alignright”]Click here to check this out and buy on Amazon[/amalinkspro]
How Do You Cut Edible Pictures?
To cut edible pictures, it is best to leave the plastic backing on. We have discovered that this helps to give the picture some structure so that you can easily hold it and cut well.
Remember to follow the outline of the picture and cut in small increments; bear in mind that it is possible to cut off than to add what you have cut off.
For a picture that we intend to place on a fondant plaque before using on the cake, we do not cut to the outline; we leave off about an inch or two. Then after trimming the picture to within an inch or two to the outline, we remove the plastic backing and lay the picture on the rolled out fondant. Finally, we stick the picture to the fondant with edible glue and then do the final trimming.
Why Do Edible Images Bubble?
Edible images bubble when they are placed on icing that has been over whipped. This is the case for buttercream and such frostings. So when the air in the icing rises to the surface of the cake, they would be trapped by the picture and since there is no way of escape, the image would form bubbles. The way to avoid this not to over whip your icing; but if you do, you can use a thin pin to puncture the bubble.
For fondant covered cakes, the secret to avoiding images with bubbles is to ensure that your cake is bubble free. This means that you must ensure that your fondant is smooth and that any air bubbles that form is punctured before you place your edible image.
[amalinkspro type=”cta-btn-css” ctabtn-id=”” asin=”B07V7SK7K5″ apilink=”https://www.amazon.com/dp/B07V7SK7K5?tag=cakedecorationproducts-20&linkCode=osi&th=1&psc=1″ addtocart=”false” new-window=”true” nofollow=”true” alignment=”alignright”]Click here to check this out and buy on Amazon[/amalinkspro]
What Kind Of Printer Do I Need For Edible Images?
The kind of printer that you need for edible images is one that is compatible with edible ink. Two brands are known for the production of this type of printer and they are Canon and Epson.
Most crafts/cake shops prefer cannon because the printhead is easily detachable for replacement or cleaning. Epson on the other hand does not have a detachable printhead.
That said however, both brands are compatible with food safe edible ink cartridges that are refillable. Just bear in mind that whichever brand you decide to buy, you need to have a cleaning kit that you would use to always clean the printhead so that it would always stay unclogged.
What’s The Difference Between Rice Paper And Icing Sheet?
The difference between rice paper and icing sheet is in the material that they are made from. Rice paper which is also known as wafer paper is made of potato starch, water and oil while icing sheet also known as sugar or frosting sheet is made of thin layers of icing that is hard pressed onto a plastic backing.
Due to the materials that is used and the method of manufacture, icing sheet is thicker than rice paper. Icing sheet also has the capacity to produce high quality images in contrast to rice paper.
Most cake decorators prefer to use icing sheets because of its ease of use and the quality of edible image that it produces.
[amalinkspro type=”cta-btn-css” ctabtn-id=”” asin=”B07XHNTXNG” apilink=”https://www.amazon.com/dp/B07XHNTXNG?tag=cakedecorationproducts-20&linkCode=osi&th=1&psc=1″ addtocart=”false” new-window=”true” nofollow=”true” alignment=”alignright”]Click here to check this out and buy on Amazon[/amalinkspro]