Cake stenciling molds are easy to use tools that help you take your cake decorating to the next level. But before we explore the different types that abound, let’s explain the essentials.

[amalinkspro type=”cta-btn-css” ctabtn-id=”” asin=”B07VF4KMK5″ apilink=”https://www.amazon.com/dp/B07VF4KMK5?tag=cakedecorationproducts-20&linkCode=osi&th=1&psc=1″ addtocart=”false” new-window=”true” nofollow=”true” alignment=”alignright”]Click here to check this out and buy on Amazon[/amalinkspro]
What is Stenciling?
Stenciling is the process through which a design is transferred to a surface by dabbing, spraying or sponging paint through an object. The object usually would have the design cut out into it so that when the medium is applied you would get the design on the surface. The objects used to transfer these designs are known as stencils.
Stencils can either be plastic, wood, metal, paper or silicone; the rule of thumb for all stencil materials is that they must be thin. The thin material would have letters, designs or patterns cut out from it. This would produce the patterns or letters cut out when you place the stencil on a surface and apply paint through the holes and cutouts.
Cake Stenciling and Stenciling Molds
Cake stenciling is basically the same thing as stenciling on any surface; the only difference is that this surface is cake.
You can apply stenciling to cake with different medium. Medium here refers to any material that is used to transfer the image or pattern to the cake. This medium can be royal icing, edible paint, food coloring, luster dust, fondant, marzipan or gum paste.
The medium can be applied with a spatula, paint brushes, airbrush gun or just your bare hands.
Cake stenciling molds come in different forms and shapes and are made of different materials. We shall be discussing the different types of stenciling molds and how they can be used.
Different Types of Cake Stenciling Molds
The different types of stenciling molds include; acrylic stenciling molds, mesh stenciling molds, silicone stenciling molds, lace stenciling molds and plastic stenciling molds. These different cake stenciling molds are used with different medium and they produce different designs.
Let’s go on and see how these molds work and the type of designs they produce…
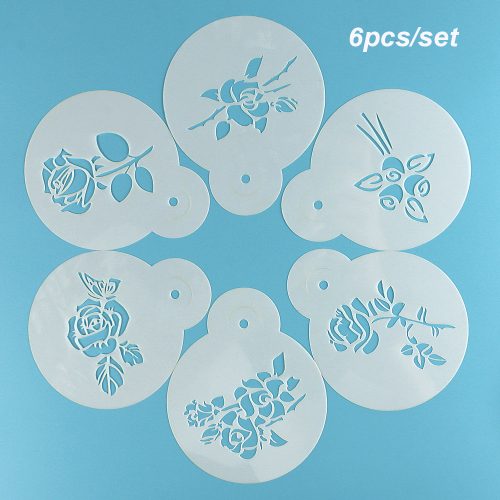
Acrylic Cake Stenciling Molds
 [amalinkspro type=”cta-btn-css” ctabtn-id=”” asin=”B01KQ5V4HG” apilink=”https://www.amazon.com/dp/B01KQ5V4HG?tag=cakedecorationproducts-20&linkCode=osi&th=1&psc=1″ addtocart=”false” new-window=”true” nofollow=”true” alignment=”alignright”]Click here to check this out and buy on Amazon[/amalinkspro]
Acrylic cake stenciling molds are made of food grade acrylic and they produce beautiful designs. You can use royal icing or airbrush with acrylic cake stenciling molds. But no matter the medium you want to use, there are tutorials and instructions that would help you.
Here are a few tips for using both mediums with acrylic cake stenciling molds:
Tips for Using Royal Icing and Acrylic Cake Stenciling Molds
Use the Right Consistency of Icing
If you want to use royal icing with your acrylic cake stenciling mold, you have to ensure that the royal icing is the right consistency. The royal icing has to hold its peak; it shouldn’t be too thick neither should it be runny. Too thick and your designs won’t come out fine and smooth; too runny and the icing would bleed into the design and spoil the end result.
Place your Stencil and Apply Icing Carefully
When you have the right consistency of royal icing then you can proceed with your stenciling. Place the stencil on the cake and secure it with either sewing or acupuncture pins. To keep the smaller detail holes from darting out and spoiling your design use a piece of tulle.
Cut a strip of tulle that’s wider than the stencil and place it over the stencil and secure them together onto the cake. You have to ensure that the tulle is smooth without any crease. When this is done, cover the remaining part of the cake that you are not yet working on. This is to ensure that excess icing won’t get onto the cake.
With an offset spatula apply your royal icing from one end of the stencil to the other. Do this gently and ensure that you do not lift the spatula in the process. If you lift off the spatula before you get to the end, you might lift off the icing and smudge the design.
Reminder
Remember that you apply your icing in one direction for a smooth and even coating.
When you’ve applied the icing, use a scraper to remove the excess icing but do not remove too much. Just scrap enough icing to leave an even and smooth coating. After this you can now remove the pins and gently lift the stencil and tulle.
If you are doing repeated patterns, please ensure that one pattern dries before making the next one.
Tips for Airbrushing on Acrylic Cake Stenciling Molds
 [amalinkspro type=”cta-btn-css” ctabtn-id=”” asin=”B001TO578Q” apilink=”https://www.amazon.com/dp/B001TO578Q?tag=cakedecorationproducts-20&linkCode=osi&th=1&psc=1″ addtocart=”false” new-window=”true” nofollow=”true” alignment=”alignright”]Click here to check this out and buy on Amazon[/amalinkspro]
Preparing to airbrush on acrylic cake stenciling molds follows the same preparation procedure as described above. Remember to cover the rest of the cake so that the paint won’t smear the rest of the cake.
When airbrushing on your stencil, keep the airbrush at least 18 inches away from the cake. If you want to get a deep shade of color you would have to spray more than once. Don’t forget to leave the previous layer to dry for a few minutes before applying the next layer. If you spray heavily at once, you’ll end up with heavy drips and smudges on the cake.
For those who don’t have airbrush, luster sprays can work just as well. There are many colors and varieties in specialty stores. Follow the same procedure as with an airbrush gun.
Finally, remember not to handle your finished product before they dry to avoid smudges.
Mesh Cake Stenciling Molds
 [amalinkspro type=”cta-btn-css” ctabtn-id=”” asin=”B06XRXX4JY” apilink=”https://www.amazon.com/dp/B06XRXX4JY?tag=cakedecorationproducts-20&linkCode=osi&th=1&psc=1″ addtocart=”false” new-window=”true” nofollow=”true” alignment=”alignright”]Click here to check this out and buy on Amazon[/amalinkspro]
Mesh cake stenciling molds are made of loosely knit fabric that has many holes that are spaced closely. These types of cake stenciling molds are thin and light. They are more flexible and lightweight than acrylic molds.
Mesh molds produce finer and smaller details than the acrylic molds. They can be used with royal icing, sugar veil, edible paints, luster dust and food coloring. Sometimes mesh cake stenciling molds are not used directly on cakes.
Tips for Using Mesh Cake Stenciling Molds
The transfer method can be used to apply the design to the cake. The medium that’s used for the transfer method include royal icing and sugar veil.
In the transfer method, you apply the medium to the mold, allow it to dry then remove the finished product and attach to the cake.
If you are using edible luster dust or food coloring or airbrushing, then you have to use the mesh mold directly on the cake. The same procedure applies as for acrylic cake stenciling molds. Thankfully, mesh molds are more flexible than acrylic molds and are easier to wrap around the cake (especially round cakes).
Mesh cake stenciling molds are more delicate than acrylic molds and should be handled with care. Wash your mesh molds carefully with warm soapy water and pat dry with a dish towel. Do not scrub or dry vigorously so as not to tear the little detail cutouts.
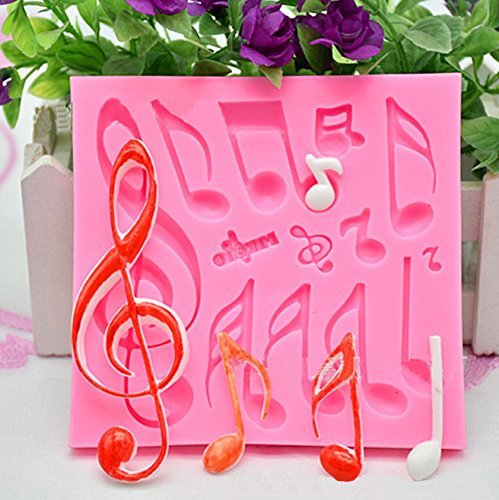
Silicone Cake Stenciling Molds
[amalinkspro type=”cta-btn-css” ctabtn-id=”” asin=”B07VXHYXWY” apilink=”https://www.amazon.com/dp/B07VXHYXWY?tag=cakedecorationproducts-20&linkCode=osi&th=1&psc=1″ addtocart=”false” new-window=”true” nofollow=”true” alignment=”alignright”]Click here to check this out and buy on Amazon[/amalinkspro]
Silicone cake stenciling molds can be used to make a wide variety of designs and works beautifully with a number of medium. They are made with food grade silicone which makes them ideal for sugar dough like gum paste, fondant or modeling chocolate.
Tips for Using Silicone Cake Stenciling Molds
They are not used directly on cake but used as a design transferring tool. These molds allow you to produce neat 3D designs that are not messy. All you need to do is press in the medium, allow it to dry and then remove and attach to the cake. You can also store the design made until you are ready to use them.
A long time ago only plastic stencils were used to transfer designs to cakes but now there are many types of cake stenciling molds.
") [amalinkspro type=”cta-btn-css” ctabtn-id=”” asin=”B07XGPCQ7X” apilink=”https://www.amazon.com/dp/B07XGPCQ7X?tag=cakedecorationproducts-20&linkCode=osi&th=1&psc=1″ addtocart=”false” new-window=”true” nofollow=”true” alignment=”alignright”]Click here to check this out and buy on Amazon[/amalinkspro]
[amalinkspro type=”cta-btn-css” ctabtn-id=”” asin=”B07XGPCQ7X” apilink=”https://www.amazon.com/dp/B07XGPCQ7X?tag=cakedecorationproducts-20&linkCode=osi&th=1&psc=1″ addtocart=”false” new-window=”true” nofollow=”true” alignment=”alignright”]Click here to check this out and buy on Amazon[/amalinkspro]
Silicone cake stenciling molds allow you to get the beautiful designs that can be gotten by other kinds of stencils but without the mess.
Although silicone cake stenciling molds are easy to use, the consistency of the medium used matters a lot. We can’t emphasize this enough because the end product depends on it.
Reworking Fondant or Gum Paste for Silicone Cake Stenciling Molds
If you want to use fondant, you’d have to add some CMC or tylose powder to it to give it more elasticity and firmness. Then before you press it into the mold, you sprinkle the mold with some corn starch. This is to enable the finished product to pop out easily without denting the shape.
Gum paste already has the right consistency for silicone molds; but that’s only if you used the right recipe. If you notice that your gum paste is sticky, also dust the mold with corn starch before pressing in the paste.
Reminder
For any medium you use on a silicone mold, you should give it about 5 to 10 minutes in the freezer. This would further firm it up and allow the finished item to detach easily from the mold.
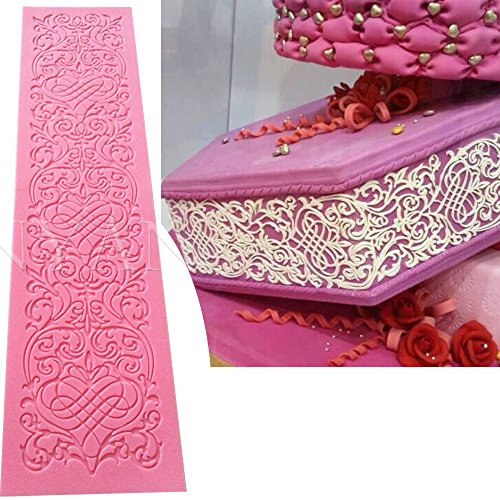
Lace Cake Stenciling Mold
 [amalinkspro type=”cta-btn-css” ctabtn-id=”” asin=”B016B51R04″ apilink=”https://www.amazon.com/dp/B016B51R04?tag=cakedecorationproducts-20&linkCode=osi&th=1&psc=1″ addtocart=”false” new-window=”true” nofollow=”true” alignment=”alignright”]Click here to check this out and buy on Amazon[/amalinkspro]
Sugar veil or sugar lace is one of the trending mediums used in cake decoration. This design is achieved with lace cake stenciling molds; they give the cake an elegant delicate effect that can’t be achieved with other kinds of molds.
These types of molds are the thinnest and most fragile of all the cake stenciling molds available for now; they are also called lace mats.
The effect produced by the lace stenciling molds is the same with that of the mesh stenciling molds. The difference between the two is that the mesh molds are made of fabric while the lace molds are made of silicone.
Tips for Using Lace Cake Stenciling Molds
Lace cake stenciling molds are quite easy to use. One thing to note however is that the consistency of the medium used is key to the effect you’ll get. This is true for all stenciling molds.
Use The Right Consistency of Medium
There are ready to use recipes for lace cake stenciling molds; they are known as sugar veil pre mix. You can make your own sugar veil mixture from scratch ; there are a number of recipes online. There are also sugar veil powder that you can mix and use; they are known as sugar veil confectionery sugar
When you’ve gotten the right consistency of your sugar veil mixture, all you have to do is just apply the mixture to the mold/mat. Spread the paste on the mold and ensure that all the fine details are covered then scrape off the excess.
Leave to dry for twenty four hours or overnight. Some decorators put it in the oven for 10 to 15 minutes at 60 °C. This maybe dicey if you are a beginner so we advise you air dry overnight. If the oven is too hot or the mixture stays too long in the oven, your end product would be brittle.
Remove The Lace Carefully
When removing your lace from the mold, carefully test from one side to be sure that it’s fully dried. Properly dried lace mat should lift off and not feel sticky to feel; if it still feels sticky then it’s not completely dry.
There are various sizes of lace cake stenciling molds; some are small enough for borders and accents while others are big enough to cover a whole cake. The size you choose would depend on the project you want to execute.
Storing Your Finished Product
When you have peeled off your lace from the mold, wrap them separately with parchment paper and keep in a cardboard box.
Do not leave your finished product out without properly wrapping it. This is because the drier it becomes, the more brittle it gets.
Wrapping in parchment paper allow the lace to retain some moisture and remain as it was when it was first made.
Conclusion
Cake stenciling molds are such a convenient means of creating stunning effects on cakes and baked goods. There are several varieties to choose from as we have shown in this article.
Before you go off shopping for any cake stenciling mold, take out time to read reviews. Also checkout tutorials on how to use each of these molds; that would help you understand them better.
The advantage of watching tutorials and reading reviews is that you won’t be flying blind when you start decorating your cake. One thing that we’ve discovered that also helps a lot is to pick a cake that has a design you’ll love to master.
With that “prototype” in view, you begin to check out the products used, the recipes and techniques applied. By following the step by step instructions of how your “prototype” was made, you’ll be able to reproduce what you see.
Remember that you might not get it right the first time but with practice, you’ll surely get better. So keep at it; keep practicing and keep experimenting. Sometimes by adapting different methods from different decorators you can come up with your own unique method that works for you.
 [amalinkspro type=”cta-btn-css” ctabtn-id=”” asin=”B01EJHGILE” apilink=”https://www.amazon.com/dp/B01EJHGILE?tag=cakedecorationproducts-20&linkCode=osi&th=1&psc=1″ addtocart=”false” new-window=”true” nofollow=”true” alignment=”alignright”]Click here to check this out and buy on Amazon[/amalinkspro]
Finally, we recommend that you check out the following articles for more information on cake decoration and products:-
- Gum Paste Flower Cutters- Creating Edible Flowers
- How To Make Fondant Cake Decorations
- VonShef Electric Hand Mixer – Full Review
- How To Cover A Cake With Fondant
- HOSL Fondant Tools Set –Full Review
- How To Write On A Cake
